Saturday, December 31, 2011

New Year Resolutions by Helen

Hello - it's Helen here - well we've finally reached the end of the year! This is usually a time for reflection - a time to look back and a time to look forward. A time for New Year Resolutions

Some people love them and some aren't so keen.


Some people think that they don't really achieve much.


What scrapbooking resolutions will you be making this year?

Scrap more?
Finish those half done projects?
Use the stash you have up or sell/donate it?
Scrap faster?
Try new techniques?
Try new challenges?
Buy smarter - make a list of what you need/already have?
Blog more?
Comment more?
Join a crop?
Use those tools that you bought but are gathering dust?
Fill in the gaps in your albums to tell a coherent story?
Learn better photography skills?
All of these and more?

Sometimes it can be helpful to keep it simple and to focus on just one thing

If that doesn't help them there's always a more chilled approach


Whatever you decide I hope that the New Year involves you joining us in the Counterfeit Kit Challenge - we'd love to see you. From all of us to all of you - Happy New Year!

Friday, December 30, 2011

Preparing for a New Year of Scrapping by Susanne

If someone asked you what you do to mark the end of a successful year of scrapbooking, what would you say? Would it be - get ready for the next one?
Well, a new year is upon us – and since I get a kick out of starting something new, I thought I would share 5 tips to prepare for it.
1) Get over the fact that you did not finish some of the projects you started.
There you have it, and lest you think I am all talk and no action, pop over to my blog  and see.

a. Either reclaim the pictures and usable supplies from them for your stash or
b. Toss them as is (count how many – I will explain later),
c. or if you must, pick 1 or 2 and make them a priority in January, pledging to go back to steps a. and b. if they are not finished by Jan. 31st.
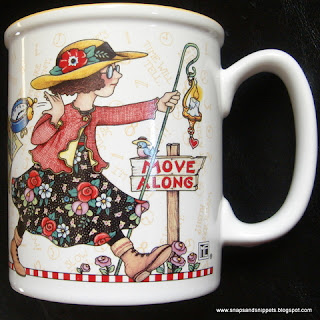
As a favorite mug of mine says – Get Over It, Get On With It. Move Along.


2) Purge 7 or 17 or 27 things from your workspace. If you are familiar with FlyLady then you know all about the 27 fling boogie. Without over thinking it, just grab the items you know you will never use again because

a. you don’t like them anymore,
b. you don’t know how to use them,
c. you don’t think you have anything to go with them or
d. you don’t know why you ever bought them.
If you cannot toss them, you can donate them to a local elementary school, church rummage sale or charity crop and enjoy a little more elbow room in your space.
3) Set up some simple housekeeping chores for your workspace.
a. Clean up a little more often – even doing 3 or 4 simple tasks to keep tidy will keep you ready for the next project.
b. Each of our spaces is set up differently, so tackle that one problem area you have and add to it as good habits develop.
c. Enjoy that neat and tidy elbow room.
4) Make your pictures a priority. For most of us, most of the time, that is where the layouts start. You cannot help but be inspired by pictures. So surround yourself!
a. Organize them – this means making sure they are accessible.
b. Get a ready supply of pictures printed.
c. Figure out a few ways to display your pictures and finished layouts.
5) Decide to try something new for the New Year – do!
a. Take a class at your local scrapbook store, attend a local crop regularly or make a standing date to scrap with a friend.
b. Participate in an online forum – at an online scrapbook store, or an online education site, or a kit club forum. Select some blogs to frequent. There are lots of options – find ones you like and participate OFTEN.
c. Join in online challenges – there are beau coup choices on photography, techniques, sketches, related forms of art, supplies challenges and, of course, the challenges right here on this blog.
d. Figure out which activities best spur you to actually scrapbook and concentrate on those.

Wednesday, December 28, 2011

Thank You Cards by Jemma

Have you finished all the left-over turkey yet?  Eaten all the chocolates?  Found the cat/dog/baby beneath all the discarded wrapping paper?  After the Yuletide excesses of eating, drinking and gifting comes the task of saying “Thank you”!  I was brought up to hand-write letters to thank for my Christmas treats although my children prefer to e-mail (which can be rapidly edited to tailor it for the next recipient) or simply phone.  However, I still like to send (and receive) thank you notes.  With this in mind I wanted to add interest this year by making some super-quick cards with my scrapping supplies.


This card is really easy to do - just die-cut some card letters and add to a piece of folded card for a faux dry-embossed look.  [Inspired via Pinterest - here]


Or how about some tags from scraps with stickers or stamps to express your gratitude? [Inspired via Pinterest - here]  It’s also a great way to use up scraps of Christmassy patterned papers:


If you need to mass-produce some cards and have a colour printer there are plenty of resources available, including these lovely cheerful designs by Creativemama:


Or create something yourself with an on-line tool like Tagxedo:


Pop over to my blog if you want to know how I produced my word-art!

Thank you for stopping by!


Monday, December 26, 2011

Post Christmas Chaos!!!

Ahh, the day after Christmas! I hope all of you out there had a wonderful holiday. All the rush is over and its time to sit back and relax right? Well, not really. You still have those decorations to contend with in a few days. And why would I bring that up now? Well, I have years and years of layouts of all the same layouts: sitting on Santa's lap, putting up the tree, opening presents, etc. This year I wanted to add a little something different to my collection of layouts. I wanted something fresh. I created this layout to add pictures to in about a week or so:

Have you guessed? This layout is reserved for when those wonderful decorations come down and those lights get all tangled up! Don't you just love my little light border? I used my Gypsy to create it using the Christmas Cheer cartridge for the light bulbs and the Cindy Loo cartridge for the string part.

Another topic that you could use with the same title would be the aftermath of opening presents.
What out of the ordinary topics have you scrapped for the holidays? Let me know!
Happy Post Christmas Chaos!!!
Milissa

Sunday, December 25, 2011

One Little Word by Bethany

For the last two years I have been inspired to participate in Ali Edwards One Little Word Challenge.  You can find the details from last year HERE.  The basic premise is this...

You spend some time contemplating a word that you want to define you for the next year.


Once you have picked your word for the year, you need to document it in some way...find a way to display it and put into words why it is meaningful to you.

I chose to cut my word out in vinal and put it up in my craft room.  Here is my word for 2011 displayed over my favorite window.


I also created a layout last year about my word.  I thought it would be a good time to get myself onto a layout for change.


When I move onto my new word, I move the vinal letters to another wall in the room.  Soon I will have my words going all the way around the top of my room.  I really love that.  It is a work in progress.


I have already chosen my word for this year and will be sharing it on my blog in 2012.  I hope you will join me in picking a word and attitude that will be significant for you this year.


Saturday, December 24, 2011

'Twas the Night Before Christmas

Christmas is tomorrow! Are you ready? Or will you be up most of the night wrapping presents? I would like to encourage you to take some time today to just stop, take a breath and enjoy, because it will all be over tomorrow!
A tradition that we have at my house…my husband always reads “A Visit From Saint Nicholas” (also known as “Twas The Night Before Christmas”) to the kids after they open their new Christmas pjs. I love it, it is so sweet to watch them all stare at Daddy intently as he reads! I ould love to encourage you to start this tradition with your own children if you haven’t already!
You can find this gorgeous printable version at The Graphics Fairy:

This would be beautiful printed out on vellum or parchment paper, folded or downsized, and tucked into your December Dailies!
Merry christmas Eve!!!
-Margie

Friday, December 23, 2011

Milk and Cookies for Santa

Merry Christmas, everyone!  This is Sherri, and I want to share some adorable ideas that I found online for leaving out milk and cookies for Santa.  Some are simple and include free downloads for you to print; others are more elaborate but totally inspiring.  I hope you find an idea that inspires you, too!  The links to original blog posts are below the photos.

http://www.partyblog.mygrafico.com/santa%e2%80%99s-milk-and-cookies/

 Merry Christmas!
This first photo just amazes me.  Isn’t it beautiful?  It’s also the perfect alternative for me, since my kids aren’t little anymore.  The “grown-up” feeling would be great for a holiday party, as well.  There is a link to an affordable download, or you could take inspiration from the photo and make your own decorations.


http://tatertotsandjello.com/2011/11/28968.html?utm_source=feedburner&utm_medium=feed&utm_campaign=Feed%3A+blogspot%2FOivM+%28Tatertots+and+Jello%29

This next photo is from a fabulous blog called “Tatertots and Jello.”  Tons of great ideas and free printables!  The “Cookies for Santa” printable is a free download that you can print on white cardstock or patterned paper (like Jen did.)  I love the patterned background-I think this would look great printed on ledger paper, don’t you?  Just print, add some red baker’s twine, and attach to any empty jar.  I like the glass mug, too!


http://www.scribd.com/doc/45798250/Cookie-Milk-Note-to-Santa-by-Fresh-Chick-Design-Studio

This last photo is also a free printable that would be perfect for those procrastinators (like myself) who decide on Christmas Eve that they want to do something special for Santa.  Simply print the sentiment, have your child sign the letter, then frame it.  Display the frame beside a plate of cookies and a glass of milk.  I love the little milk bottle in the printable-an empty Frappuccino bottle would be perfect to hold milk for Santa!
I hope you’ve enjoyed these ideas-and I hope that your holidays are the happiest!  Merry Christmas!
-Sherri

Thursday, December 22, 2011

Winter Solstice by Rebecca

This is Rebecca.  Happy Winter Solstice, for those of us in the northern hemisphere.  While our southern counterparts are enjoying their longest daylights of their year, we are experiencing the shortest daylight of 2011. 


But it's a celebration, because it just gets lighter from here!  So take advantage of whatever light you can find today and celebrate the return of light:

--Take an outdoor picture.  Check out http://weather.thefuntimesguide.com/2006/01/winter_pictures.php for some good basic winter photography tips. And I found this site http://photo.net/learn/point-and-shoot-tips with some really good general photography tips for those of us with point-and-shoot, basic digital or film cameras.  I sometimes wish I had a fancy camera and the skills to use it; This article made me realize that I could just get better with what I've got!

--If you're doing a December Daily/Journal Your Christmas type project, think about using Winter Solstice as your theme today.  Some journaling prompts: How does the short daylight time impact you and your mood? What is it like to go to work in the dark and come home in the dark and not get to see daylight? What do you look forward to with the return of more daylight?  This blog post http://womensmemoirs.com/memoir-writing-prompts/memoir-writing-prompt-winter-solstice-and-more/ provides a good journaling prompt idea, to focus on a turning point in your life.  It's a good day to feel a little gratitude!

--Read about the origins of winter solstice and Yule celebrations. http://www.bbc.co.uk/religion/religions/paganism/holydays/wintersolstice.shtml Even if you're not Wiccan or Pagan, see if you can find any of your own traditions in the historic roots and celebrations of Winter Solstice/Yule! http://www.circlesanctuary.org/pholidays/SolsticeArticle.html

--Light a candle or a fireplace to usher in the return of light. Or, for a more delicious rake on that symbolism, make a Yule log cake (Buche de Noel)! I collected several pictures/recipes on a Pinterest board here: http://pinterest.com/rebecca_delo/bouche-de-noel/

--And for less calories, try a yule log craft, like http://blog.craftzine.com/archive/2009/11/toilet_paper_tube_yule_log.html or http://www.marthastewart.com/how-to/yule-log-favor-boxes
Hope you are enjoying the daily posts here on the blog.  We're coming close to the end, and this is my final post for the month, so Merry Yule, Happy Solstice, Merry Christmas, and Happy New Year! 
See you in 2012!
Rebecca

Wednesday, December 21, 2011

Using Punches to Make Embellishments

Have you ever used several of your punches together to make an embellishment for your projects?  I discovered two really cute Christmas embellishments a few years back that can be made using 5 punches.   
For instructions on how to make the tree or Santa visit my blog at http://razzledscrapper.blogspot.com/.

Happy Scrappin' and Merry Christmas,
Glinda

Tuesday, December 20, 2011

Recycled Christmas Cards by Jen

CHRISTMAS CARDS

Here are some great ideas I found on Pinterest.
What are you going to do with all of the holiday cards you received?
A wreath. The holly leaves are made from Christmas Cards. Originally from Good Housekeeping.

Good Housekeeping How To

Ornaments made with lids. They suggest canning lids, but I think this could be easily adapted to any lids. Originally from Better Homes and Gardens.

BHG How To

Monogram gift tags. I love these. They really dress up a gift. Originally from Martha Stewart.
Martha Stewart How To
Triangle gift boxes. These are so cute and practical. Originally from make homemade gifts.com

http://www.make-homemade-gifts.com/gift-box-patterns.html

Cube box. As shown it can be opened and have a gift inside, but I like the idea of a closed cube also. It reminds me of the photo cubes you can buy. Originally from Crafts@suite 101.

Circle punch ornaments. I have seen these all over the place the last few years. This is a great tutorial. Originally posted at ScoutieGirl.
http://www.scoutiegirl.com/2009/12/tutorial-crafting-a-holiday-card-keepsake-ornament-by-nicole-of-lillyella.html
 Christmas Card book. This is a great tutorial on how to save your cards into a book. I love this idea as is, but I am thinking about making my December Daily next year by using my Christmas card fronts backed with patterned papers. A card for each day. Pictures on the patterned paper side, journaling or whatever on the card side. Originally from The Creative Place.
http://thecreativeplace.blogspot.com/2010/01/tuesday-tutorial-christmas-card-saver.html
There are a lot more ideas of things you can make with Christmas cards on Pinterest. I have a Uses for old Christmas Cards board that you can see at http://pinterest.com/jennifercro/uses-for-old-christmas-cards/  if you would like to see more ideas. There are so many here that I would like to make. I hope I get TONS of Christmas cards.
Merry Christmas!!!
Jen

Monday, December 19, 2011

Peg Angels by Helen


Hello, its Helen here today with an idea for some Christmas decorations. Do you remember making these peg dolls as a child? I can remember one dressed in fabric scraps, and decided to make 3 little peg doll angels using paper scraps and trims. This is a great project to do with the kids (or just for yourself if you are a big kid like me!)


They are really easy to make and cheap too - my pegs came with stands and I got 10 for £1 in the sale at The Works earlier in the year. Everything else is just scraps and a great excuse to break out the sparkly papers and trims. Some of the left over pegs will get painted for tree ornaments and some our daughter will decorate for herself.

First of all I drew the faces and coloured the hair with Sharpies and felt tips. Next I made a template for the dress and wings out of scrap card - again this is easy - but I've taken a photo to give you an idea if you'd like to make your own and would like a starting point.

Then I chose the paper for the dress, cut it out and decorated with sparkly trims and ribbons. I ran a strip of glue down one edge and wrapped the dress around my peg.

For the wings I found a really old sheet of glittered vellum - but any paper would work and paper doilies would look pretty too. Once my wings were cut I added fluffy, glittery fibers around the edges - I knew if I kept them long enough I'd find a use for them!

Once the wings were glued in place I made a halo from a gold pipe cleaner (thank you Ellie). You could easily use any wire you have to hand - even that silvery, twisty wire that holds toys in place in their packaging! The end of the pipe cleaner is pushed down the back of the dress (poor angel!)

A bit of blu-tac helps to keep my pegs in their bases - but it would be easy to make these into hanging ornaments if you added a screw-in eyelet to the head (poor, poor angel!) or tied ribbon around the peg before adding the dress. You could also wrap a pipe cleaner around the peg for arms and have her holding a little hymn sheet. Here are my 3 finished angels

Finally for inspiration here are a few links to others who have made some really gorgeous peg dolls.

http://ideasforscrapbookers.blogspot.com/2010/11/tropical-christmas-angels-by-sandy.html

http://rubberstamping.about.com/od/projects/ss/Clothespin_Dolls.htm

http://mysweetimaginations.typepad.com/mysweetimaginations/2008/12/red-friday-shop-update.html

http://nicethingsforyou.blogspot.com/2007/11/peg-angel-fairy-dolly.html

Sunday, December 18, 2011

The Details of the Season by Lisa

Lisa

Today I’d like to talk to you a little about scrapping all the small things that make up this time of year. And I’m not talking about the little scamps that many of you have running around getting hyper-excited at the thought of all those presents, though.

Yes, today I’m talking about non-kiddie scrapping! In fact, let’s try scrapping even without people.

Just a few of the things that I see right now that make me get into the jolly feeling are:

·      The shops filling with scrumptious Christmas cookies and chocolates
·      The arrival of the Toffee Nut Latte at Starbucks


·      The opening of the Christmas markets here in Germany
·      The Advent wreath and the lighting of the first candle
·      The tree (oh how I love my tree!)
·      Cookies, or rather Plätzen in German, preferably home baked if I have time


·      The food and drink that’s only available at the Christmas markets – Poffertjes and Glühwien
·      Sparkly fairy lights on the balcony
·      My sometimes un-traditional coloured decorations


I find that my Christmas scrapping mostly involves these details rather than the main events – the dinner, the presents and the people – because these are the things that add the sparkle to Christmas for me. I’m not going to forget the dinners we have or the members of my family but I might forget how excited I was when I tasted my first Toffee Nut Latte, or how beautiful my pink baubles were.

So this year, I decided it was time to record the first Poffertjes of the season. Never heard of them? Nor had I before my first Christmas Market. They are a Dutch speciality and are sort of tiny, mini, puffy pancakes that are served with butter and icing sugar. They are simply divine! You can read about them here (http://www.kitchenbutterfly.com/2010/01/20/how-to-make-poffertjes-aka-dutch-mini-pancakes/) I was inspired by a layout from the October Afternoon blog featuring an over-laden banner and pretty much lifted it completely! (http://octoberafternoon.typepad.com/october_afternoon/2011/11/thursday-sketch-2.html )


This layout makes me smile and is another piece in the puzzle of what makes Christmas for me. I had such fun using up all those bits and pieces on my layout - sprinkles of sequins, buttons, bling, labels and twine. It came together really quickly and makes me want to do the same over and over again!

What details are missing from your scrapbook pages? Try to identify one little thing that is part of Christmas for you and record it. No kids allowed J

Thanks and have a great day! Lisa

Saturday, December 17, 2011

Christmas Gift Card Holders by Sherri

With less than 10 shopping days left until Christmas, are you beginning to wonder if you will be able to finish your holiday shopping?  Every year, I tell myself that I will begin my shopping earlier and finish before December even arrives.  Never happens-ever!  I find myself resorting to gift cards at the last minute, especially for some of my hard-to-buy-for relatives.  To add a personal touch, I love to wrap the gift cards in a cute little gift card holder.  Here are some festive gift card holders, for both kids and adults, that I found on Pinterest:


Here is a cute cash holder, too!

I’m so sad that this will be my last post for the Counterfeit Kit challenge, but I am so very glad to have found this incredible blog and met the wonderful girls who make it so much fun.  I can’t wait to play along again this summer.  Until then, may you all have the happiest of holidays!
Hugs, Sherri

Friday, December 16, 2011

Ribbon, Ribbon, Buttons...Oh, my! by Crystal

Crafting for Caitlyn


I have had these done for a while and kept thinking they would fit into one of the design team projects I needed to do but they did not, well they sort of did this week for Frosted Designs but I chose to go with something else.

The trees are from M's they are the cardboard ones since I was too cheap to buy the foam (four bucks a tree vs 1.19 for the big one here.) NOW the ribbon tree and I fought, A LOT but I love how it came out just do NOT put your hand inside as the ribbon is held on there with pearl stick pins since the glittered ribbon I was using would NOT stick! I think I used six or eight whole rolls of ribbon on it, but I did not pay more than a buck for each roll. I LOVE how it came out! I will be packing it up nicely and using it over and over.


Now with the button tree which I must admit I love the best, I painted the chipboard (I think that is what it is) tree with green acrylic paint, then got all my red and green and a few clear buttons out and randomly placed them on there with glue dots. Some are held with pearl pens and then some Sticko Shimmering silver dots (LOVE THESE THINGS NEED TO FIND MORE!) for some added bling. Super simple and easy and I love it! I did use all but two of my red buttons though LOL!


Both of the trees have toppers from the mini tree area at Hobby Lobby ( I think they were a buck a piece).(Put the topper on the button one after pictures!) Not too bad for two very unique pieces huh? I have one more and had intentions of doing it with scrap paper, curled up but it will be a project for next year.

What do you think? They are so much more vibrant in person and blingy!