Welcome to {i}NSD at The Counterfeit Kit Challenge!
I'm back with an idea about how to make your own version of enamel dots using plastic beads.
Perler (or similar) beads can be found in most craft shops, and even Ikea, in jars of literally thousands. With a little work and ingenuity, these thousands of beads can be turned into dot embellishments at a fraction of the price of the ever-popular enamel dots. You need never run out again!
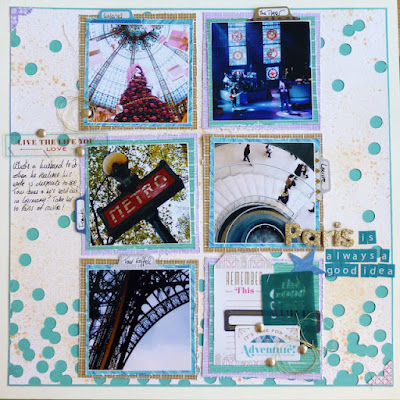
Of course, you can iron-melt a perler bead shape and then apply that to your layouts just like you would any sticker or dimensional detail but I looked around online and found that faux enamel dots were to be found in every corner! Different brands of beads work and melt in different ways – the beads I used took around 30 mins at 200°C and easily provided small, evenly-sized, shiny, bright dots so give yours a go and see how they work. I used almost 20 on my first layout and I’d never have been so generous if those had been normal enamel dots!
But I love gold embellishments as much as the next girl and was determined to find a way to turn these bright plastic shapes into something a little more luscious. A gold sharpie worked well and covered the dot evenly and smoothly, even if they were a little dark. Heat embossing re-melted the plastic and distorted the perfectly round shape. It took a little time and patience but painting the dots with nail varnish provided the prettiest results and how much fun is it to scatter gold dots all over the layout without worrying about using up the whole pack!
Any plastic beads can be used to create little or large dots to use on your pages. Mini-perler and “pony” beads can be found in a multitude of colours and sizes including clear and pearl which would make a great mix. Imagine a whole pile of pretty Prima-style pearls swirling across your layout.
Tiny flowers and hearts are possible by placing your perler beads in a circle with a contrasting colour in the middle or with three beads in a triangle respectively, while cookie cutters can be used as a shape form for your melted art - you will need to coat the cutter and the beads with a little spray oil first.
The only limit is your own imagination but a few minutes on YouTube or Pinterest will provide you with so many ideas and inspiration on different ways to melt your way into pretty, individual embellishments for your cards, pages or projects.
Melt on!
Instructions:
- Line a flat baking tray with greaseproof paper or a non-stick liner. Pre-heat the oven to 200°C. Place the beads a little distance apart on the tray, standing on end. Carefully place the tray in the pre-heated oven.
- Check the beads at 10 minute intervals. As they melt, they will form mini-donut shapes. This is about the half-way point.
- After about 30 minutes, your beads should have fully melted, the donut hole in the middle will now be filled and the top of the “dot” should be rounded. Leave in for another 5 minutes if they are not all at this stage until you are satisfied with the look you have achieved.
- Take out of the oven and leave to cool. Using a spatula knife, carefully release your beads from the baking parchment and leave to fully cool. You can attach them to your layout using glue dots or a dab of clear glue.
- To change the colour of the beads, I found it easier to take each dot and stick them on the end of my craft knife so that the top surface of the dot was fully accessible and then to use two coats of nail varnish to get the desired shade!
Here are two layouts I made using my "forged" enamel dots!

I hope you will give this a try and let me know how you get on.
Don’t forget to link up over on the {i}NSD posts in our Counterfeit Kit Community Facebook Community for this and ALL the following challenges to come for a chance to be entered in our prize draw!
You can also share over at Instagram where you can can find us @counterfeitkitchallenge and/or tag us using #counterfeitkitchallenge and #ckcINSD2022
Also a reminder about our PRIZE DRAW for a chance of winning a 1st prize of $25 voucher and 2nd prize of $15 voucher to your online scrapbook store of choice.
All you have to do is link up your kits and/or creations on the {i}NSD posts over at the Counterfeit Kit Community Facebook Community.
You have until MIDNIGHT on SUNDAY 15th MAY to play along and link up before we throw all your names into a hat and pull the lucky winners!


No comments:
Post a Comment
Compliance with the new European Union E-Privacy Regulation
If you leave a comment on this blog, you do so with the knowledge that your name and blog link are visible to all who visit this blog, that you have published your own personal details and that you have consented for your personal information to be displayed.
This blog is currently generated from the USA with contributors from Europe, Australia and the USA.