Showing posts with label A Year of Cards. Show all posts
Wednesday, December 24, 2014
Operation Write Home
I know we have mentioned it on our blog before, but it is always good to remind ourselves about Operation Write Home. It is a great organization and is such a simple way for us to get involved in supporting and encouraging the people who keep us safe and sacrifice every aspect of their lives for me and you.
Stop by Operation Write Home to see how you can make a huge difference and enjoy your creative holiday all at the same time. I want to encourage you to make an effort this year to make a card to give and make a card for Operation Write Home to send out. It will take no more time and effort on your part and is an easy way to help.
Tuesday, December 23, 2014
New Baby Cards - Part Two
Today I'm working on Buttons & Banners-inspired New Baby cards.
I've pulled an assortment of buttons to add to my supplies.
Another boy card:
![]() |
| Pinterest inspiration HERE |
And one for a girl:
![]() |
| Pinterest inspiration HERE |
When I started to work on ideas for New Baby cards,
I kind of had it in my mind that it would be a card sent to new
parents but there are other functions of new baby cards.
![]() |
| Pinterest link HERE |
(Now if I can only lay my hands on my crochet hooks...)
![]() |
| Pinterest link HERE |
![]() |
| Pinterest link HERE |
Enjoy the remainder of the month with your family & friends.
See you next year!
Monday, December 22, 2014
New Baby Cards - Part One
Well I think this has been a really FUN month of card inspiration!
Very timely as we are about to begin a new year - a time when we all pretend that THIS year we will be organized & resolve to keep up with our correspondence & sending cards to those we love. I hope to spend some time during quiet January to be inspired by all of the wonderful things the DT came up with and to stock up with a new card supply for 2015.
New Baby Cards
Isn't he precious?
Born just last week to a close friend of my daughter.
(Guess who will be getting one of my cards, hehe!)
Putting together my kit was as easy as pulling out these two boxes,
one for boys & one for girls, (reveal tomorrow) in which I have collected
scrappy goodness for grandbaby pages. Added some card blanks & voila!
I spent a lot of time trolling Pinterest & discovered that most of
what appealed to me fell under the category "Buttons & Banners".
More on that tomorrow! Today's card was inspired by crib mobiles...
![]() |
| Pinterest inspiration HERE |
The animals were from a puffy sticker set in the boy box.
Tune in tomorrow for New Baby Cards - Part Two!
And not to steal any thunder from our posts regarding Christmas cards,
but I can't help but think of the precious baby Jesus at this time of year.
This is the CHRISTmas version of a "New Baby" card:
My prayer for you is that His birth, death & resurrection
would lead you to a saving knowledge of Jesus Christ.
Sunday, December 21, 2014
New Home Cards - Inspirations and Templates.
Hello, Angela here again, with some of the cards I've made with my New Home card making kit (see yesterday's post), and some links to fabulous free templates I've found around the web, for making those cards a little extra special.
My Cards.
Links to Free Templates.
My Cards.
| The one on the left here is done using Iris Folding. I took the cutout piece, running it through a bricks embossing folder to make the centre piece house for the 2nd card. |
Links to Free Templates.
Iris folding, is a really easy, yet very impressive looking technique. The website is no-longer active, but The Circle of Crafters have kindly left all their free iris folding templates up and available for us. You can find the house shaped template here.
![]() |
| Iris Folded House Card - Click for Free Template |
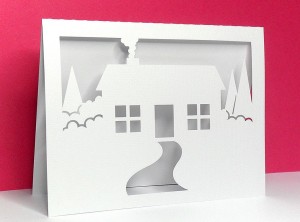
If you have a cutting machine, you could pick up this gorgeous free cutting file from Bird's Cards.
![]() |
| Free cutting file @ Bird's Cards. |
I found some pop-up card templates too, for making the inside of your cards stand out.
Make Popup Cards have a number of free templates, including this simple house. There's even a video tutorial. To get the free template for the simple house you need to sign up to their free newsletter.
![]() |
| Simple House pop-up card. Need to sign up to their newsletter for the free template. |
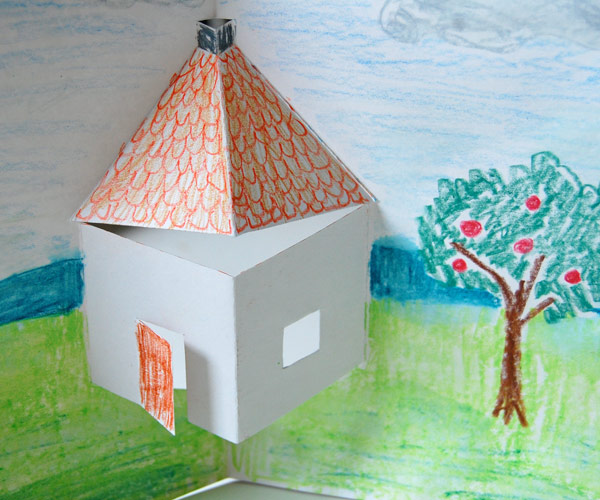
Popupology have something a little more detailed, again with a video tutorial.
![]() |
| Popupology Free Pop-up House Template. |
For my final piece of inspiration, I've found this lovely door card by Lynn Pratt. She has shared a free template in her fabulous blog post.
| Double door card with free template. |
Happy card making everyone, and be blessed, from Angela.
Saturday, December 20, 2014
New Home Cards - Assembling a Kit
Moving house can be quite a stressful time, but there's nothing more special than turning a house, or flat into a home. I'm Angela, and I have a number of friends and family moving house at the moment. I like to send them a blessing card for their new home. There's also some short-term rent houses in our neighbourhood, so having a few welcome to your new home cards in my stash is always useful, and helps them to settle well into our little street.
When making a batch of cards, it's great to have a card making kit. So what have I found in my stash to put together and craft with?
Happy crafting, and be blessed.
from Angela.
When making a batch of cards, it's great to have a card making kit. So what have I found in my stash to put together and craft with?
- My starting piece was a sheet of house paper from Amy Tangerines's Ready Set Go, that I pulled for my November kit, but didn't use.
- Country feel papers to match from the Pebbles paper pack by Front Porch.
- sheets from an old DCWV 6x6 textured card-stack
- Bricks embossing folder by Darcie. There was a sample piece of co-ordination card stock included with the folder, and it colour matched nicely. I ran it through the embossing folder and sanded the raised areas.
- Red & Green ribbon
- Papermania mini brads and buttons that I've had for years.
- Stamps & Rub-ons.
- Wooden keys
- Card blanks.
I made a set of wooden house embellishments for my kit from some scraps of marquetry wood I inherited. You can find a tutorial on how I made these over on my blog.
This is the first card I have made using the kit, only it's already been whipped off my desk and given away. If you come back tomorrow I'll show you the rest, and share some places where you can get free templates for some extra special New Home Cards.
Happy crafting, and be blessed.
from Angela.
Friday, December 19, 2014
Get Well Cards - Part Two
Hello again, Susanne here. Back today to show you more get well cards that I made from my kit, and to point you in the direction of some great card inspiration.
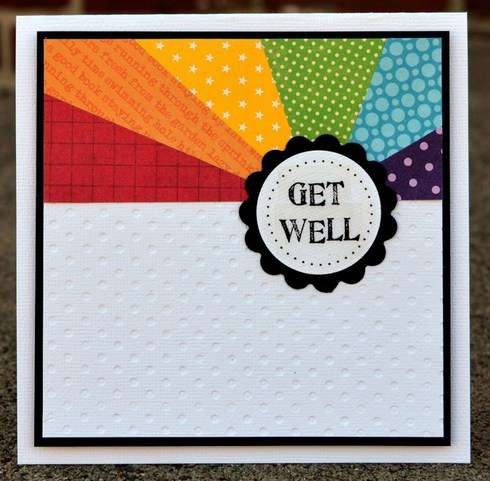
While digging for stamps to use with my kit I realized that I don't really buy "Get Well" stamps. I buy other caring sentiments like Thinking of You and Praying for You (these were in various Stampin Up sets). I find these sentiments are more versatile for sending to those who are chronically or critically ill.
If you click over to my blog, you will find a few more examples.
When I am stuck on getting started or short on time to create a card, I regularly turn to stamp company catalogs like Stampin Up, Hero Arts or Close to My Heart. Another avenue of inspiration is my stamping sister-in-law Trenna. Her card style is different than mine, so I hope you will find the variety inspiring.
Thanks so much for stopping by today. Tomorrow you will find Angela posting about New Home cards. See you then.
While digging for stamps to use with my kit I realized that I don't really buy "Get Well" stamps. I buy other caring sentiments like Thinking of You and Praying for You (these were in various Stampin Up sets). I find these sentiments are more versatile for sending to those who are chronically or critically ill.
If you click over to my blog, you will find a few more examples.
When I am stuck on getting started or short on time to create a card, I regularly turn to stamp company catalogs like Stampin Up, Hero Arts or Close to My Heart. Another avenue of inspiration is my stamping sister-in-law Trenna. Her card style is different than mine, so I hope you will find the variety inspiring.
Thanks so much for stopping by today. Tomorrow you will find Angela posting about New Home cards. See you then.
Thursday, December 18, 2014
Get Well Cards - Part One
Hello, Susanne here today working on a kit for Get Well cards. Making cards is something that I procrastinate about, and always regret later. So this month's friendly little nudges here @ CKC will do me good.
I started my kit by using . . . a kit. Foul! you cry. Now wait just a minute. It is a very simple card set from Stampin Up that is meant to get new stampers stamping. Well, it might just work forold experienced stampers too. Basically, it contains card bases, envelopes, stickers, twine and rhinestones. Being more of the scrapping sort than stamping sort, I have added to the kit. See now, there's fair play.
I found large paper scraps from my last several counterfeit kits in complementary colors to the card bases. Then I searched my stash for buttons, small flowers, twine, washi tape and ribbon. I think that is enough elements with which to start work. For stamps, I pulled sentiments from various Stampin Up sets. I might use some punches as well.
Here's my kit excluding the stamps.
And here is one of my first cards.
You can pop over to my blog for another card. And then, I'll see you back here tomorrow with more examples to inspire you.
I started my kit by using . . . a kit. Foul! you cry. Now wait just a minute. It is a very simple card set from Stampin Up that is meant to get new stampers stamping. Well, it might just work for
I found large paper scraps from my last several counterfeit kits in complementary colors to the card bases. Then I searched my stash for buttons, small flowers, twine, washi tape and ribbon. I think that is enough elements with which to start work. For stamps, I pulled sentiments from various Stampin Up sets. I might use some punches as well.
Here's my kit excluding the stamps.
And here is one of my first cards.
You can pop over to my blog for another card. And then, I'll see you back here tomorrow with more examples to inspire you.
Wednesday, December 17, 2014
Sympathy Cards - Part Two
Hi, it's Jemma back with some more cards made with my Sympathy kit from yesterday:
This design is quick and simple - any scraps of patterned paper get the serious treatment from the black mat and edging my sympathetic phrase with toning ink ties it together. I punched flowers from the same card as the base and added some clear gems from my stash.
I cut one of my sentiment phrases into a banner shape and topped a circle of the yellow patterned paper from my kit with tiny punched butterflies ... almost a sunflower?
With a bit of luck I have managed to share my MS Word Document containing a variety of Sympathy sentiments below. But if not, here's the link direct to the document. It previews rather strangely but should download properly!
And here are some more examples from the web that inspired me:
And of course sympathy is appropriate if someone is ill too ... and then you really can let rip with the cheery colours:
And sometimes it's nice to send a card to someone who is feeling blue:
Finally, it's important to know what to write inside a bereavement sympathy card. Here's a great article with suggestions for around 50 "dos" along with a dozen "don'ts" and Hallmark have some great tips too.
This design is quick and simple - any scraps of patterned paper get the serious treatment from the black mat and edging my sympathetic phrase with toning ink ties it together. I punched flowers from the same card as the base and added some clear gems from my stash.
I cut one of my sentiment phrases into a banner shape and topped a circle of the yellow patterned paper from my kit with tiny punched butterflies ... almost a sunflower?
With a bit of luck I have managed to share my MS Word Document containing a variety of Sympathy sentiments below. But if not, here's the link direct to the document. It previews rather strangely but should download properly!
And here are some more examples from the web that inspired me:
![]() |
| Sympathy cards don't need to be dull! |
![]() |
| Love the pretty punched posy |
| Wonderful white on white card |
![]() |
| A rainbow will brighten up anyone's day! |
| Brilliant use of tiny heart punches! |
That's it from me for this year, I'm already working on January's Counterfeit Kit and hope to be back to scrapbooking and blogging with renewed energy in 2015. Until then have a wonderful festive season.
Merry Christmas from Jemma xxx
Tuesday, December 16, 2014
Sympathy Cards Part One
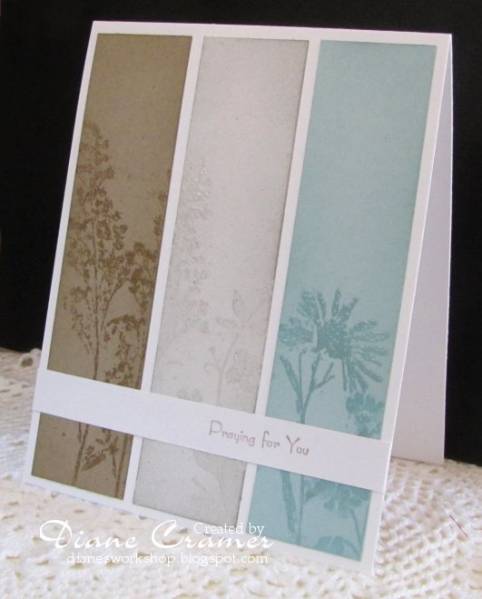
Today it's Jemma's turn to share a card kit with you: for Sympathy cards. I have to admit I have never made a sympathy card before and was wondering how to make them slightly serious, but still pretty, so I turned to Google for inspiration! I found lots of beautifully stamped cards with heartfelt sentiments such as this one from Diane Cramer in the Splitcoastsatmpers' Gallery:
I love the clean lines and the subtle touch of colour in this soothing card. However, I'm not a stamper and have neither the right sort of images nor sentiments. So I knew that my card kit would have to feature patterned papers and I would have to find a solution for the wording. I decided a mix of black, white and grey patterns with a couple of sheets of coloured patterns to add a little cheer would be the way to go:
A few toning ribbons and trims plus my Martha Stewart butterfly punches would add texture and form. Grey and white card will form the base with some black for matting.
That left me the problem of the wording. I used a MS Word to create a table of sentiments in a variety of fonts and added a sentiments to circle shapes. I printed this out onto white card:
And here is the first card that I made with my kit - using a 1.5" circle punch for one of the sentiments and adding a couple of blue gems from my stash to brighten up the butterflies.
I'll be back tomorrow with a few more of the cards made from my kit and some links to inspiration on the web.
I love the clean lines and the subtle touch of colour in this soothing card. However, I'm not a stamper and have neither the right sort of images nor sentiments. So I knew that my card kit would have to feature patterned papers and I would have to find a solution for the wording. I decided a mix of black, white and grey patterns with a couple of sheets of coloured patterns to add a little cheer would be the way to go:
A few toning ribbons and trims plus my Martha Stewart butterfly punches would add texture and form. Grey and white card will form the base with some black for matting.
That left me the problem of the wording. I used a MS Word to create a table of sentiments in a variety of fonts and added a sentiments to circle shapes. I printed this out onto white card:
And here is the first card that I made with my kit - using a 1.5" circle punch for one of the sentiments and adding a couple of blue gems from my stash to brighten up the butterflies.
I'll be back tomorrow with a few more of the cards made from my kit and some links to inspiration on the web.
Monday, December 15, 2014
Sketches are our Friends - A Friendship Card
Hi there, neighbor! It's Lynnette again and I'm back today with another sketch to speed up your card making. Here's a great one to use up those scraps on your desk.

Just weave them along, any way you fancy, add a few embellishments and you are ready to mail a card out to let your BFF to let her know how much you care.
So remember to quickly pull a few supplies together and check out card sketches on Pinterest to speed up your card making process! Your bestie will be glad you did when she receives your handmade card! Thanks for stopping by.
Sunday, December 14, 2014
Kits are our Friends: A Friendship Card Kit
Hello there! It's Master Forger Lynnette and I'm here to show you how quickly you can pull some supplies together to create some handmade friendship cards. You know those times you just want to let someone know how important they are to you? Maybe when they need a little pick-me-up? Sure, you could drive down to your local Hallmark store to get a card, but ain't nobody got time for that! You've got the supplies, so let's use them. And since you'd probably send a friendship card on a whim, you want to make your card making fast. My secret to fast and fun cardmaking? SKETCHES! Just go over to Pinterest and search "card sketches". You'll be amazed at what comes up.
First up, here's my kit. We all know from Counterfeit Kit Challenge that kits are a super way to make assembling any papercrafting project easy. Take a look at just the few supplies I pulled together:
Next, here's the sketch I found on Pinterest:
Last, here's the card I created:
Stop back tomorrow when I'll share another sketch and card with you! Happy cardmaking!
First up, here's my kit. We all know from Counterfeit Kit Challenge that kits are a super way to make assembling any papercrafting project easy. Take a look at just the few supplies I pulled together:
Next, here's the sketch I found on Pinterest:

Last, here's the card I created:
Stop back tomorrow when I'll share another sketch and card with you! Happy cardmaking!
Saturday, December 13, 2014
Holiday Cards 2: Part 2
So, have you put together your card kit to get busy making some cards? :-)
Once I started using my kit, I just couldn't stop! Yes, it was a big kit but I ended up making 10 (!) extra Christmas cards for my collection. I think I'm done now for this year and that feels great.
The secret to my success of Christmas cards is to use the fortnightly inspiration offered by the very fabulous girls over at Jingle Belles. A fresh card challenge every two weeks with inspirational designs offered by the Belles, Lauren and Stephanie is simply the best way to make the task of producing hand-made Christmas cards easy, manageable and fun.
So this was my first starting point when I picked up my mini-kit. I went through some of the recent weeks and found this great sketch by Stephanie.
I say it often, but I'm really not much of a card-maker. I find the mini format difficult to design and be creative with so if I'm going to the effort of making one card, I usually try and just run off a second one at the same time. They may be identical, or they might just be variations on a theme such as these two.
And then, via the supportive community I've found at Jingle Belles, I've found myself so very inspired by Lisa over at 'Tis the Season card challenge. Again, sketches and challenges which are great jumping off points for this non-card-maker!
This card is actually almost identical to two I made for a Jingle Belles challenge back in the summer. I had the die-cuts left over from that time and was going to make two more replicas. But when I saw Lisa's sketch, I realised that if I just flipped my design over, then not only would I have created something a little different to the first two cards, but it would also fit the sketch. The sequins on the wreath add an extra something to this simple design.
And of course, then there's Pinterest! I've got a whole board devoted to those wonderfully designed cards I come across on-line and while there's not one particular pin behind these cards, the overall feel of a number of my pins - with all the layers and elements - can be found on these two makes.
And last but not least, I just wanted to use up a few more of the bits and pieces left in my kit.
Now, the internet is literally overflowing with card making ideas and it can feel overwhelming, but if you look around, I'm sure you will find a place where you feel comfortable to stop at regularly to fill up your cup of inspiration - much like we all use the Counterfeit Kit Challenge blog to shop our stash and then use it!! Bringing together the kits you make over here with some of the card-making challenges over "there" - wherever that might be - can be a great combination.
We'd love to see your card creations over at our December Mr Linky so why not get making and sharing?!?
Once I started using my kit, I just couldn't stop! Yes, it was a big kit but I ended up making 10 (!) extra Christmas cards for my collection. I think I'm done now for this year and that feels great.
The secret to my success of Christmas cards is to use the fortnightly inspiration offered by the very fabulous girls over at Jingle Belles. A fresh card challenge every two weeks with inspirational designs offered by the Belles, Lauren and Stephanie is simply the best way to make the task of producing hand-made Christmas cards easy, manageable and fun.
![]() |
| Jingle Belles |
I say it often, but I'm really not much of a card-maker. I find the mini format difficult to design and be creative with so if I'm going to the effort of making one card, I usually try and just run off a second one at the same time. They may be identical, or they might just be variations on a theme such as these two.
And then, via the supportive community I've found at Jingle Belles, I've found myself so very inspired by Lisa over at 'Tis the Season card challenge. Again, sketches and challenges which are great jumping off points for this non-card-maker!
![]() |
| 'Tis the Season |
This card is actually almost identical to two I made for a Jingle Belles challenge back in the summer. I had the die-cuts left over from that time and was going to make two more replicas. But when I saw Lisa's sketch, I realised that if I just flipped my design over, then not only would I have created something a little different to the first two cards, but it would also fit the sketch. The sequins on the wreath add an extra something to this simple design.
And of course, then there's Pinterest! I've got a whole board devoted to those wonderfully designed cards I come across on-line and while there's not one particular pin behind these cards, the overall feel of a number of my pins - with all the layers and elements - can be found on these two makes.
And last but not least, I just wanted to use up a few more of the bits and pieces left in my kit.
Now, the internet is literally overflowing with card making ideas and it can feel overwhelming, but if you look around, I'm sure you will find a place where you feel comfortable to stop at regularly to fill up your cup of inspiration - much like we all use the Counterfeit Kit Challenge blog to shop our stash and then use it!! Bringing together the kits you make over here with some of the card-making challenges over "there" - wherever that might be - can be a great combination.
We'd love to see your card creations over at our December Mr Linky so why not get making and sharing?!?
Subscribe to:
Posts (Atom)


.jpg)
.jpg)


.jpg)
.jpg)
.jpg)