Sometimes you just don't have the time or motivation to make and use a full kit. No problem, you can make a mini kit! Our Master Forgers Lisa and Anna are here to get you started.
Let's have a quick look again at the inspiration kit this month.
 |
| Mercy Tiara Kits Feeling Groovy kit |
MF Lisa
I was wondering what direction to go and felt myself totally drawn to the colours of that single piece of pink/orange floral paper.
And as has been the case in recent kits, it reminded me of a collection on my shelf: Good Stuff by Simple Stories. It's full of pinks and yellows and peachy orange as well as some stronger greens. And there is a cassette motif as well which felt like a sign! I have some scraps, the sticker sheet, a partial 6x8 pad, some brad stickers left in the collection so I dragged those out and added in some enamel dots and a die cut pack from another collection with labels which I thought could be useful. I had decided to make a brown paper bag mini-album so brown paper recycling bags went in too along with some paint to cover up the printing which would show on the folds! My plan was coming together!
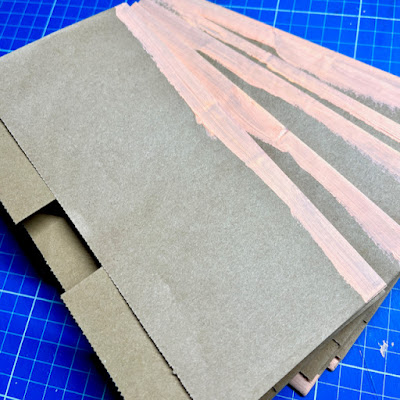
First of all, I needed to paint the edges of the chipboard covers and the folds of the bags where the printing would show. I just used a pale peach tone of acrylic paint and didn't really try to do it neatly as the paper would cover most of that up.
(I'm a big trial and error type person and I can promise you that there was a LOT of trial and error in this one!)
Then I cut all the papers in the 6x8 pad for the inside elements and slightly bigger for the outside covers. I then realised that I would need a few more so I added in some Simple Stories Color Vibe papers in yellow, pink and orange.
Here are the bags all folded up ready to stick to each other. I used my bone folder on each of the creases to give them a crisper fold. Then I stuck each of the bags together so that there is a pocket on one side (the opening of the bag that you can see here) and then a folded section on the other side. It's a bit complicated to explain but shout if you need more info!
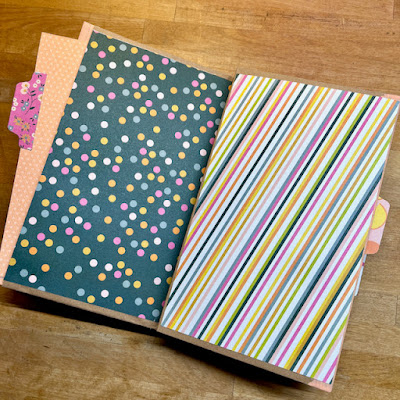
Once all the inner pages were connected, I added patterned paper to the front and back covers, as well as each of the internal flaps. I also added in inserts with tabs in the pockets. A bit of cover decoration from the sticker sheet, brads and enamel dots and I was done with the main body of the mini.
You can see all the pretty edges, inserts, tabs and papers.
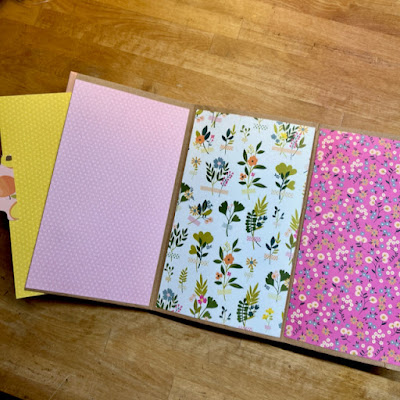
Here is the pocket on the left and the folded in flap on the right that then extends so that each page is three sections for photos, journalling etc. LOADS of space for ALL the stuff!
See! Three sections when all is folded out. I used six bags so that I actually have a total of 24 "pages" to decorate. I'm going to be filling this mini with details of my crafty summer swap from 2019. All I need is to print out the photos, do a little writing and add in the tags etc from the swap and this book is DONE! I definitely want to get this done SOON so I promise to share the results when it is finished!
MF Anna:
I guess we're just in the mini album making mood because that's what made for my mini kit project as well! I love to make little albums using old book covered (yes, I "gutted" the old book). I will be also share a more detailed tutorial over on my blog later this week if you're interested although there are lots of great tutorials on YouTube!)
First, I pulled six sheets of 12x12 paper plus a cut apart page, that were inspired by the kit. I was able to get enough pieces to make two signatures (the insides of the album) from the six papers (2 of each design).
One of the sheets is a cut apart of 3x4 cards which I used to create pockets and embellish the pages.
I punched two holes on each end of the spine of the book and added eyelets, plus one more hole in the middle for the tie (I used a scrap bit of fabric for the tie)
Embellish the pages as desired. I used a couple cut aparts to make pockets inside the covers and on a few pages. I also embellished the cover with some chipboard pieces from the Paige Evans collection, Go the Scenic Route.

I really love making these little books because I know I can cut up a bunch of paper for one book and I feel more like I've made a dent in my stash when I do that (even if it means I end up with a lot of scraps!)
I'd love to know if YOU have ever made an altered book or mini album before? If so, please share in the comments before or in the Facebook group!
Here is what the rest of July's month of inspiration will look like:
- 12th July- Challenge #1 - To inspire you to get creating from your own kit.
- 18th July - Challenge #2 - To inspire you to get creating from your own kit.
- 28th July - Follower's Showcase - who has caught our eye this month.
- 31st July - Killing the Kit - an idea or two focusing on using up the bits and pieces left in your kit.
You know that we always love to see your work, so please share your kits and projects with us. You can post them in our Facebook Community or share them on Instagram (we are @counterfeitkitchallenge or tag us using #counterfeitkitchallenge and #ckcjuly2023).
 |
| Thanks for stopping by! |


Fabulous mini books ladies. I love both of them!
ReplyDelete