Showing posts with label punches. Show all posts

Monday, October 12, 2015

October Challenge #2: 3-D Project


Challenge #2: 3-D Project.  Let's all get out of our comfort zones.  No cards, layouts or mini albums.  Don't be scared by the above projects (really, they are stunning), but try your hand at your own 3-D paper project.


If my design team has not fallen over yet from the out of the box creating they had  got to do...here is a peek at their projects:

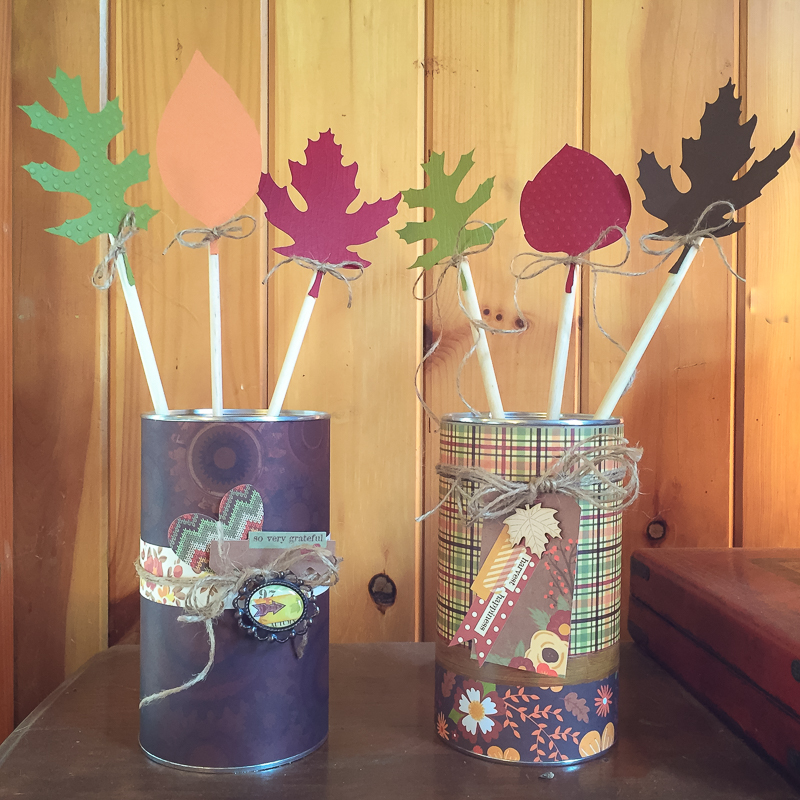
Kelly created cute fall centerpieces for her dining room table. You can see more at her blog.

Susanne whipped up a pumpkin place card that started out with a punched shape from an unused pocket card - more angles and details on her blog.


Julene has covered a paper mache heart with bridal lace and cute heart buttons.
(and herself with mod podge)


******************************************
We would LOVE to have you participate!  Check out the How to play along with us tab at the top of the page to see how you can play along after you make your kit!  We have a month full of special challenges and ideas so we can get some creating done and get some supplies used up.


Sunday, October 12, 2014

Challenge #2: Confetti Challenge!


We have another great challenge from Queen Laura!


When I was looking for a kit for us to Counterfeit, I checked out Ashley Calder's Etsy Shop.  Unfortunately, the kits are a little too small to base a whole month of scrapping on.  I couldn't get them out of my head, though, so this challenge is inspired by THIS KIT.  On the far right hand side of the picture is a bag of awesome confetti.

Challenge #2:  Use confetti on your layout.

Here are some ideas to get you started:

Ashley Calder Layout Process Video

Confetti Tape on Etsy

I think the DT is done cleaning up the messes they made with all that confetti and are ready to share with you now...

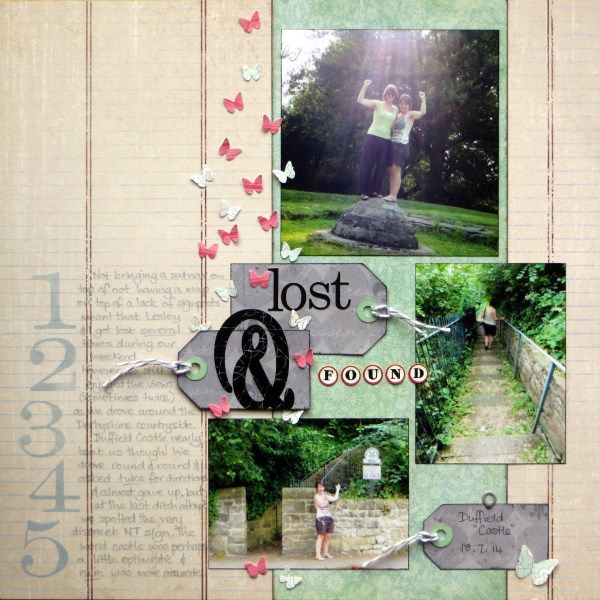
LesleyG used one of her favourite punches to create her confetti

Jemma has had fun with her butterfly-shaped confetti:


Julene used some white confetti on a card
 

*********************************************************************************
Don't forget how YOU can get involved:
1.  Link up to Mr. Linky (see the sidebar)
2.  Check out the great projects our team has made and comment on their blogs
3.  Chat with us on Facebook!  CKC Facebook Group
4.  CKC Flicker Group
5.  CKC on Pinterest
6.  Join our end of the month members blog:  Blog Hop Information

Sunday, November 25, 2012

A little Video Inspiration

This first video has nothing to do with anything...just that I happen to love it! 


Now onto some scrappy inspiration:


And if you link me up to some of your favorite scrappy vidoes...I will love you forever!

Monday, September 3, 2012

Organize This-Week 17

This week's Organizational Challenge is punches!  Here is the link to Wookie Mouse's "Organize Your Stuff" Week 17. Our own Master Forger, Milissa, has created a post about her punch organization, you can check it out on her blog, One Happy Scrapper.
One Happy Scrapper Blog
With the "comeback" of punches, including all of those great border punches...this week's Challenge is probably going to come in handy!


Tuesday, May 8, 2012

Tutorials: City of Lights Kit

Aqua Airmail Washi Tape (Freckled Fawn)

Exclusive With Love Gift Tags (Pebbles)

Exclusive Butterfly Stickers (Studio Calico)
The tutorials for the "City of Lights Kit" are pretty straight forward...

The Washi Tape...I'm going to be a COMPLETE enabler right now...rather than making Washi tape from your stash, Target has sets of Washi tape in 4 different color schemes in the office supply section.  They are the "Up & Up" brand.  Four (fairly large) rolls come in each package for $4.   I don't know of anywhere else that you can find Washi tape for $1 per roll...so I figured I'd let everyone know.  I bout 2 of the color schemes and have used it on LOTS of layouts already.  I think it is definately worth the $4.

And check out the AWESOME ways to use Washi tape here.

The "Love" tags are super simple to counterfeit...just grab a few scraps of Kraft paper (or any paper for that matter) and use some of those OLD mini punches that you have hanging out in your supplies.  If you have been scrapbooking for a few years, you are bound to have a few of those in your stash.  I bought a WHOLE SET at Cost-Co in probably 2001, which I have probably not used since 2001!!!  But I have a hard time purging tools, I'm happy to put those punches into good use again.

The "Exclusive" Butterfly Stickers are super cute.  And I must admit, I bought a Martha Stewart Butterfly  punch (maybe a year ago) because I knew I would be able to use it time and time again.  So pull out a butterfly punch (or any shape you love) and create some "exclusive" embellishments of your own.  This will also help you use up some of those scraps!!!

The Bicycle Stamps must be super exclusive to this kit, I couldn't even find another picture of the stamp set on the web!  You will have to look at the kit to see which ones I'm referring to.  Here is a link to a free printable vintage bicycle  and another old bicycle and a bicycle print and these 12 free bicycle silhouette files.  Enjoy!

Wednesday, March 21, 2012

Challenge #2: Punch Challenge


Challenge #2:  Use those Punches!  Border, corner, layered... don't  care what you use, but I want to see evidence of Punching on your project.

And not this kind either...


Here is some inspiration to get you started!


Friday, September 9, 2011

Tutorial- Paper Counterfeiting

This piece of paper by Sassafras was in this month's Inspiration Kit
Sherri created a wonderful tutorial for counterfeiting the stitched look on the back side of this piece of paper.  See Sherri's tutorial here. (PS- Sherri is having small give away on her blog, since this tutorial is her 300th post, all you have to do is comment  on her post and you are entered!)

There was also a strip of peach colored "paper lace"  in this month's Inspiration Kit.  These are very easy to replicate using some scrap paper and a cute border punch! 
An example of my Counterfeit Lace Paper... used a Martha Stewart punch.

Thursday, May 12, 2011

Tutorial-Tags and Embellishing Stickers


Tags
There are a few cute and colorful tags in this month's kit.  Here are a few templates and ideas to help you make your own...

Two tag templates 

Free SVG "tag" file

For those of you who have die cut machines capable of cutting True Type Fonts, check out this free set of dingbats to create lots of different shaped tags...Scallops and tags dingbat

Bonus tip:
When is the last time you used your "shaped" hole punches?  For a unique looking tag I grabbed a star shaped hole punch rather than a round hole punch to create the star shaped hole in my tags (pictured above)!  You can use any tiny hole punch for these shapes, imagine how cute a mini heart, shamrock, Christmas tree, leaf, flower, pumpkin, or birthday cake would be in place of that boring old round hole.  So pull out those "ancient" shaped hole punches and put them to use!

Embellishing Stickers

The stickers in this month's kit made us think about the older stickers we have in our stashes.  Here are a few ideas to refresh some of your old stickers. 

Altering Stickers

Wednesday, May 11, 2011

Tutorial-Watermelon Embellishments


Pink Paislee Hometown Summer Collection
The chipboard stickers pictured above are part of this month's Inspiration Kit.  There seems to be quite a few watermelons in this collection by Pink Paislee.  Here are a few DIY watermelon embellishments to help complete your Counterfeit Kit...

Watermelon mini banner and layered embellishment

Watermelon with bling  (although this isn't a tutorial, it's pretty easy to see how she made them)

Watermelon slice made with punches

Watermelon journaling block

Tuesday, April 12, 2011

Counterfeit Borders, Papers, and Journaling Blocks Tutorials

Making your own borders...
Borders-"For the Record" by Echo Park
This is the beautiful "Borders" paper that comes in this month's kit...
I decided to try and replicate these borders for my Counterfeit Kit by using various stamps, scrap paper, a border punch, some white embossing powder, and even a sheet of ledger paper.  Here's what I can up with. 


Here's a link to a free class at Two Peas In A Bucket.  The instructor uses stamps in a few different ways to create borders on the layout.  Scrapbook Stamping March 2011

Designing your own patterned paper...

Headed South-"It's the Little Things" by Fancy Pants
I tried my hand at "random stamping" to recreate this piece of paper.  It's a good thing that I was "drawn" to all of those "cancelled postage" stamps in the past...they came in handy for this paper!

Meridy's Counterfeit Paper
Some tips for random stamping...
  • Start with the largest stamp first, then medium, then smallest to "fill in the blanks"
  • Change the orientation of your stamp, tilting and turning it with each image you stamp
  • Be sure to go "off the edges" of your paper with parts of the stamped images
  • You'll be surprised how easy this is after tying it out!!!
More patterned paper tutorials...

Gabrielle also created tutorials for 2 pieces of paper from this month's kit.  She made one for the "Stamp of Approval" paper and one for the"Gerber Daisy" paper. Visit Gabrielle's blog to see those great tutorials.

Journaling Blocks...


If you made any of your own borders, papers, or journaling blocks please link them to Mr. Linky or our Facebook page to share your ideas with the rest of us.