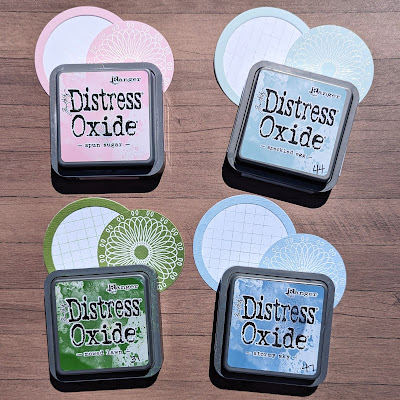
Hey hey hey! It's the fourth of April and that means it's time to share our Forgeries on the Fourth with you!! Let me remind you again of our inspiration kit:
Our Guest Designer, Nikki, from Nikki's Scrapbooking Adventures, created these beauties for her own kit and they are FANTASTIC!!
Nikki says this about her forgeries:
I love to include journaling blocks in my counterfeit kits, because I can use them for journaling or a cluster base. Taking a look at the Felicity Stickers, I noticed a circle journaling block with a grid background. Circles are a major theme within this kit and this journaling block seems to be easy to replicate that everyone can do it! Bonus, is that you get a smaller inner circle to make additional embellishments with.
Supplies:
- Color Coordinating Solid Cardstock
- Which Cardstock
- Color Coordinating ink
- Journaling block Stamp
- Stamping platform
- Nesting Circle Dies
- Mint Tape
- Die Cut Machine
Find two circles that will cover the dimensions of your journaling block stamp. In my case, my stamp is just over 3x3 inches. So I picked 2.75 inch and 2.5 inch circle dies and nested them so they have an even border between. Using mint tape to make them stable, I die-cut circles out of my colored cardstock. I recommend that you do a bunch at a time, while the dies are together, because we will take them apart later on.
Next, cut your white cardstock into a square that fits your journaling block stamp. I cut the white cardstock into 3x3 squares, the square shape is important. Place your stamp in the lower corner of your stamp platform and place your paper into the stamp platform. I did first generation stamping on one side of my paper, flipped it over and did second generation stamping on the back.
To get a grid look, like our inspiration, rotate your square of white cardstock 90 degrees and stamp. Make sure that you are stamping on the first generation side and second generation side, respectively.
Once you have stamped your grid with the coordinating colors to your card stock, take your grid paper and cut it with the larger of the two circles. In my case, the 2.75 inch circle.
Now you pick which side you want to have the grid showing. I picked the 2nd generation stamped side so that the grid is lighter than the cardstock outline. Glue that outer ring of colored card stock to the large circle grid. Now you have super cute and easy journaling blocks that coordinate with your counterfeit kit!
BONUS!
With the leftover inner circle, we're going to make the circle embellishments pictures on the Felicity Stickers image.
SUPPLIES:
- Inner Circle from previous project
- Stamp that fits within the circle
- Stamping platform
- Versamark
- White embossing powder
- Heat tool
- Anti-static tool
- Two pieces of white cardstock scrap
- Smaller of the two circle dies we used previously
To make this super easy and consistent, I made a jig to ensure that my image is centered on my color cardstock circle. Use a scrap piece of paper to cut a circle out of the middle. We will be using the outside and not the circle, so make sure that you have edges to place your magnets on.
Place the jig we made, of the cut out circle around your stamped image so that it is centered.
Now you can place your circle color cardstock within the jig and know that your image will be centered. This trick can be used with die cutting and stamping any image!
Then you can follow the normal process of using embossing powder to make die cuts that stand out on your projects.
Let's check to see what the Master Forgers have up their sleeves for you this month!
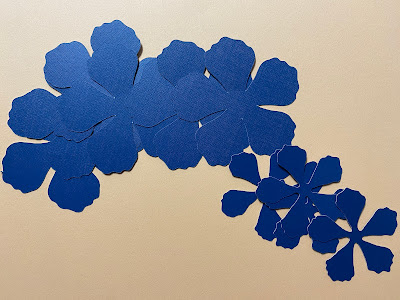
Master Forger Ryann really loves the flowers in the kit so she wanted to create some big, chunky flowers for hers. Using her die cut machine and cardstock, she created multiple colors and sizes to make her own. She curled all the petals around a thin paint brush handle, and added some bling to the centers of them all.
She also wanted to use wood veneer for the title of her layout. Using a wood grain printed paper and cutting five of the same word with her die cut machine, then stacking them together, she created the missing word she wanted for her layout. This could also be accomplished by using scraps and then the wood grain printed paper only once.
- 6th April - Mini Kit and Project Reveal
- 12th April - Challenge #1
- 18th April - Challenge #2
- 22nd April - Challenge #3 Sketch Challenge
- 24th April - Follower Showcase
- 28th April - May Sneak Peek (on Instagram and the Facebook Community)
- 30th April - Challenge #4 Baby, Use Those Scraps Challenge
We really love to hear from our followers! Make sure that you come hang out with us on the Facebook Community Group. You can also hang out with us on Instagram by tagging #counterfeitkitchallenge and #ckcApril2024!! See you next time!


No comments:
Post a Comment
Compliance with the new European Union E-Privacy Regulation
If you leave a comment on this blog, you do so with the knowledge that your name and blog link are visible to all who visit this blog, that you have published your own personal details and that you have consented for your personal information to be displayed.
This blog is currently generated from the USA with contributors from Europe, Australia and the USA.