Showing posts with label Scribbles From My Scrap Studio. Show all posts

Saturday, November 25, 2017

Scribbles From My Scrap Studio – November 2017

20171110_093631-002

November is the month of Thanksgiving here in the US, and one thing I am grateful for is having written this column this year.  It was fun to continue blogging after discontinuing my own blog, Snaps and Snippets.  Any of you remember that one? Such a catchy name! (wink)

I am also grateful that my plan for documenting the year with Project Life has worked out pretty well– not perfectly, mind you, but pretty darn well in a year that has been unusually busy for happy reasons.  Because I am fickle, many of my long-term projects do not pan out.  This one did.

Before my son’s wedding in September, I kept current on Project Life, rarely a month behind.  I stopped making monthly kits for regular scrapbooking, knowing my scrap time would be spotty.  After his wedding, I did not touch it until November. meaning I had a backlog of 14 weeks.  Luckily, the method I had used (described in this Scribbles column) worked for me.

Over two weekends, I worked on PL for a bit each afternoon.  In less than 12 hours, I finished 16 weeks. Now I concede that the wedding week had just one wedding photo referring to a separate album, but that large joyful undertaking should not be rushed.

In the future, I predict Project Life style scrapbooking will play a bigger role in my memory-keeping.  It is a bit concerning to ponder whether decorating little cards inserted into pockets could be enough paper play for me, when I have supplies enough to finish dozens of 12 x 12 traditional albums.  We will see what 2018 brings – like I said, I am fickle.

This month I have gathered up some of my pocket card embellishment ideas in a cornucopia of scrappy snaps and snippets. See what I did there. (wink) 

*  Not My Our Most Favorite Moment:  when I first saw multiples of this card in my core kit, I thought I would never use even one.  As it turns out, I used three, altering the pronoun on 2 from MY to OUR or HER.  Heck, life is messy, scrap it that way.

20171110_085657

* Flowers need flutterbys:  I cannot resist adding birds, butterflies or even bugs to floral cards along with a stamped sentiment. Flowers, even by themselves,  are getting more use on my pocket pages than in my regular albums.

20171110_085639

* Cards from memorabilia:  I sometimes cut down advertisements, handouts, or programs when the graphics are very eye-catching.  Here I downloaded a picture from the Internet to add because my snaps did not turn out.

20171110_085846


*Flair:  I used a flair most often on the main weekly card – nearly 1/3 of the weeks.  Other choices ranked by popularity of use – buttons, puffy stickers, epoxy/acrylic shapes, chipboard buttons and tiny pictures (like those on summary sheets that come with printed pictures). I like the continuity of placing an element in the same spot every week.


*Transparencies:  I add them on top of filler cards more so than on photos.

20171110_090205

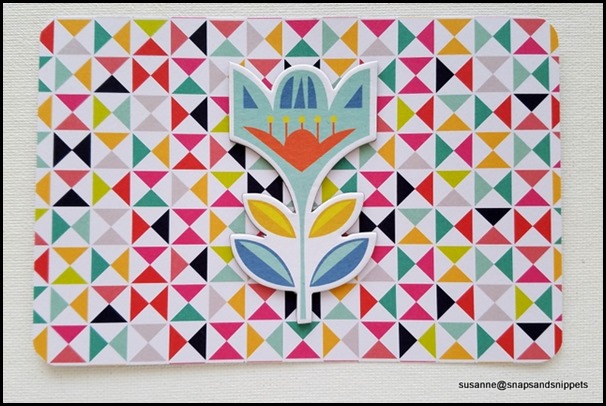
*Chipboard:  It is sweet serendipity when chipboard by one company perfectly fits the grid on a card by another.  I love when the style of chipboard seems to fit with a particular pattern so well.

20171110_09021820171110_090338

*Single banners: These are nice accents to a filler card as well as a photo – even one by itself makes a statement.  This is actually a planner magnet, so I was able to use it on both sides of the card.

CKC1

*Black and white:  Graphics from the newspaper and sentiments rubbed onto photos are two good looks.

20171110_090422

*Summary journal:  Putting the majority of my journaling on a single card each week was efficient and freed me to have that as the only non-photo slot during a week, if I wanted.

20171110_085628

So there you have it.  I hope you gleaned an idea or two to use in your scrapbooks.

There will be no Scribbles column next month, as December always brings a change of pace here at the blog.  In fact, this is the last one, ever.  I have loved my experience with the Counterfeit Kit Challenge, but I will not be continuing on the team in 2018.  My hope, if not an actual plan, is to spend less time playing with pretty paper, and more time out and about in my world.

I have enjoyed creating alongside this talented team of Clair, Jemma, Julene, Kelly, Leslie, Lesley, Lynnette, Margie, and Susan.  I so admire my scrappy colleague, who I also call my friend, Lisa.  She leads the team with unflappable commitment and enthusiasm.  That is why I am sure the Counterfeit Kit Challenge will continue to inspire us all with clever creative inspiration for using our abundant suppliy of papers and pretties.

Merci et au revoir,
Susanne

Wednesday, October 25, 2017

Scribbles From My Scrap Studio – October 2017

Hello Counterfeiters,

Susanne here, and this month, I have more scrapbooking than scribbling to share.  (Yes, I am sure you’re a bit surprised, as am I.)

With my son’s wedding behind us (which was  a perfectly beautiful day in all respects), I have had much more time in the studio.  I have been diligently working with old photos from the late 1990’s, and I have tackled them using those kits I showed you in my August column.


From June’s kit:


20171004_134141

This kit was supposed to be for card making, but I wanted to use up some sheets on a layout.  The base of this page is four 6 x 6 sheets, three of one pattern (only 3 of each in the pad) and one of another.  Then I layered four more 6 x 6 papers on top of that bottom quadrant.


From July’s kit:


20171004_131906

This, you can see, was a Daily Life kit, but in late September and early October I was back into scrapbook mode.  So I used two 3 x 4 cards and one 4 x 6 card across this page in a band.  Another 3 x 4 card was cut down for the journal block.


From August’s kit:


20171006_135006
20171006_135020

I created at least one additional project from each kit and then I disassembled the kits, returning a pittance of supplies back to my stash so that I could concentrate on October and November counterfeit kits.  I wanted to have all my kits used up and/or broken down before the holiday season. I yearned for a clean slate more than the satisfaction of having completely killed those kits.

I admit to you this is not because I want to be an organized scrapper, but to compensate for the fact that I am NOT.  I have too many kits sitting around the studio.  Proven to be fact, when recently I had to move things around so that a new floor could be laid in my studio.  During the process, I misplaced a kit that I needed to make a project just a couple days before my deadline.  Yikes, I had some nervous hours until it was located in a quite illogical location.

Speaking of deadlines, I also need to catch up on Project Life; I am a couple of months behind.   Are you a making a fourth quarter push to get projects done before the holidays?  If so, what is on your list?

Of course, if you are not organized enough to have an actual list – I applaud you, kindred spirit.

Well now, enough scribbling, back to scrapping.

Monday, September 25, 2017

Scribbles From My Scrap Studio – September 2017

20170913_100416

Memorabilia – big word, big challenge.

It was the Project Life craze that started me on saving a much greater amount of “stuff” than I did previously.  I came from a family of six children, so by necessity, my Mom didn’t save every piece of our school artwork.  In fact, with many kids and a tight budget, she could not always purchase the annual school photos.  From my school days, I only have my grade school prayer book, three school photos (kindergarten, sixth grade, high school senior), and a single report card.

20170913_100204

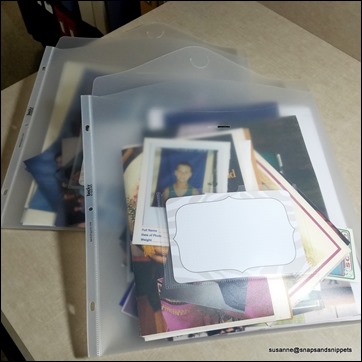
With only 2 children of my own, and scrapbooking as my “excuse” to hold onto stuff, I ended up with boxes of memorabilia stacked up in closets – and a few too many boxes to fit inside the closet as you see here.  It has been my dread of sorting through and narrowing them down, rather than sentimentality, that perpetuated my hoarding. This summer I have started tackling it, pared the volume down by 50%, and hope to do an additional 25%.  Let me share notes from the process – not just for school mementos but other things as well.

  • First of all, DO save all school portraits and all baby/toddler studio photo shoots too – both in the large size and a wallet or two (but no more).  I have an album for each of my kids containing these “official” portrait layouts.  The wallets would make a nice keepsake album for a grandparent and would cut down on their clutter.  Sure, you’ve sent them those photos over the years;  but if they aren’t putting them in photo albums of their own, how much nicer would  small albums covering long time spans be instead. I know because I have gotten many loose photos back in the past two years when the older generation had to downsize.

  • Look for ways that your children might have similar items.  If they went to the same schools with some of the same teachers, they may have had the same assignments.  Here are two of my children's art assignments based on the Fibonacci match sequence.  I like having layouts for their artwork, more so because they both did this.


    20170822_074948


  • There are many ways in which my kids are different, so I picked a sampling of my children's other assignments – that showcase a particular talent – like whiz test papers in math, or poems they wrote.  Something showing their printing as well as their cursive handwriting. Papers are especially nice when the teacher has written more than the ubiquitous “good work” comment.  That is also the rule I apply to report cards, pick 1 or 2 that are especially nice in performance or commentary and forgo the rest.

  • For oversized artwork and science project display boards, just take photographs of them.


    20170913_100042


    DSC05188-001

    In one case where my son won the school science fair competition there is a layout with other photos.  Otherwise, all school stuff, not on layouts or pocket pages in their albums, have been limited to 12 x 12 large pocket project life protectors, one each for grade school and high school/college. Here is a shot before they’ve been through a final purge.

20170902_105814
  • Moving on – what about vacation travels.  It is easy to “stuff” your purse or tote, transfer to your suitcase, haul home and toss into a box, much too much stuff.  When I eventually scrap trip photos, time and again I found that most of what I accumulated no longer held my interest.  Guide books, attraction brochures and those slick tourist magazines highlighting what is available at that vacation spot often end up in the round file or recycle pile.  The notion I would cut items out for my pages, rarely happened.  Maps, unless I am planning on going back relatively soon, or a handy mini map in a brochure, are no longer saved.  If I plan on a return trip, it will be worth getting an updated map.  Sometimes it is fun to lay all the memorabilia out, snap a photo of it, and happily toss the entire space-sucking lot. In fact, my approach to everyday memorabilia increasingly is to take a photo of it, preferably while someone is holding, wearing or otherwise using it.

  • When I have gotten behind on scrapping vacation spots we visited more than once, I purposely scrapped one trip right after another.  That way it is easy to include a few items for each trip, have more interesting variety or even repeat similar items from different trips for a sense of continuity.

  • One major exception to my new memorabilia frugality:  I am an avid fan of postcards or notecards.  Yes, I took a photo of that famous building, but it would no doubt, have lots of random unrelated people obscuring part of the view.  So I will buy a postcard or two, and include them in the scrapbook.  Here are two examples:  in the first I have actually attached the postcards to layout, as the information on the back was not important to me (photo corners decorative, not functional).

    20170730_153808spostcards

    On the second example, I originally thought I would frame these oversized postcards, so I have used photo corners that allow me to withdraw the postcards later if I prefer.  Now you are thinking: really S?  How likely is that, S?

20170902_104157

Quite likely, actually!  In fact, here are some framed mini notecards of Rachel’s Garden at the Hermitage – one of many historic mansions that hubby and I enjoyed visiting.  This has been hanging in my home for years.

I hope you found a tidbit of info here that will inspire you to deal with your memorabilia. Let me end with this

Two last pieces of advice:  do it sooner rather than later, and if your kids are young, develop a plan now!

Friday, August 25, 2017

Scribbles From My Scrap Studio – August 2017


August 25?  Already!  Summer is about done.  Traditionally, August is back to school time around here.  And in part because my daughter is back at school, I have had time to get back in the studio.  I have hardly been in the studio at all this summer, and I have missed it.  Few layouts were created this summer, although at the end of July, I managed a few page bases and a few project life spreads.  I have rather belatedly put together some kits from the fabulous summer inspiration here at the Counterfeit Kit Challenge.

First up is the lovely Willow Kit from Felicity Jane that we used for our June inspiration.  I loved the wispy sweet look of this kit and had no trouble at all compiling something of my own.

willowbyfjfjwillowkit

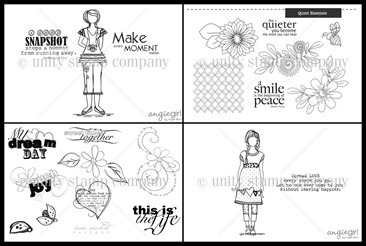
My kit is based on 6 x 6 papers – the Iron Orchid collection from Creative Imaginations.  I had a matching stamp set for it (bottom left) and chose some girl stamps sets too – all from Unity Stamp Co. I am not yet sure if I will being using this for layouts or cards, but the possibilities are fun to ponder until I have time to create.  I think this needs a name like Will–o'–the–wisp.

wispypaperswispykit
CKC15-001

And then there was the Cocoa Daisy Walden kit from 2016 that was the July inspiration kit.  I used their Day In The Life kit as the basis for one of my own, which I am calling The Good Life.
 
2016-DITL-cards-for-storejuly2017ckckit
20170714_061800kit

Initially, I had even more cards than this and then whittled it down to fit in the tray.  I will admit to being 6 or more weeks behind on Project Life, but given that it only takes me an hour or so to complete each week, I am not yet worried.  I like the idea of storing my kit in one of those muslin bags, of which I am sure I have at least half a dozen, until I can get around to using it.

And then there was the August inspiration kit, based on a recent Gossamer Blue kit.  Again, I took a peek at their pocket page kit as well as the scrapbook kit to draw inspiration.

July17GBkits

The bold colors and simplicity of these kits inspired me to try my hand at a small kit.  I started with a small blue/tan Dude page kit from Paper Loft and added in orange, green and white paper as well as all the embellishments.  I should get some fun pages from this one.

20170715_125358

So there you have it, I am caught up on making kits.  Just like it takes a few weeks to get back into the swing of a new school year, it will take me a few weeks to get back into the swing of utilizing kits too.  Taking it in baby steps, I hope to get a few finished projects posted to my Facebook page before it is time to scribble down some scrappy thoughts in September. (How is that for a wishy-washy quasi-scrappy commitment?)

In the meantime, the takeaway from this month’s scribbles should be that, when the Good Life you are living keeps you too busy to scrap, do not despair. It is never too late to make up a kit based on a prior month’s inspiration.


In fact, not only will you have the kits to inspire you, but the rest of the design team and your fellow counterfeiters will have provided additional ideas using their own counterfeit kits.

Check out the linky tab above (or click here), where you can find more than 2 years worth of finished project links. Because not everyone is as behind as S on using those kits they have compiled, don’t you know.  Let this serve as your reminder:  You are welcome to link up projects from your own counterfeit kit in any month; each month’s link table is not limited to that month’s kit.

Happy kitting (and scrapping too)!

Tuesday, July 25, 2017

Scribbles From My Scrap Studio – July 2017

DSC01434-001

Hello, counterfeiters.  Last month I prattled on about the types of inspiration I reach for – mostly on paper and not the Internet – when I want an idea quickly.  So it should come as no surprise to you that I tend to let paper collect around the studio.  Yes, it stacks up, it becomes a distraction, it gets stashed away.   Not always in a logical way.

In my rush to clear clutter and tidy the studio (like above), I tend to hide it in boxes, where it is forgotten. This goes for crafting paper, as well as note paper, steno pads, post-its, etc. This was proven to me in spades a week or so ago while I was sorting out memorabilia.  In several boxes that were meant to hold mementos, I found a bunch of other stuff!  Like what, you might ask:

1.)  Sketches, sketches, sketches printed off of various websites – including Page 7 from Jana Eubank’s old blog (don’t ask me about pages 1 – 6, I am clueless).  I tossed most into the recycling bin as I am sticking to using PageMaps and Pencilines and Creative Scrappers sketches contained in books and binders (minimizing loose sheets).

2.)  A page torn out of a stenographer’s note book that held good quotes for use on cards or layouts.  Here is a scan of it – maybe you can make out my scrawling script.  There is a nifty tip to use the Stampin Up slot punch to make large scallops, a mention of scrapodex (check out these Pinterest boards to learn more) and a stamped sentiment from Hero Arts, if memory serves:

stenosheet0002

3.)  On the opposite side were several websites:
www.thedoodlebuginc.com which is located about an hour from me. This local scrapbook store has moved locations at least twice since I first discovered it, but it is still in business – hurray!

www.bestcraftorganizer.com where I was looking at their stamp pad holders.  I never purchased their PortaInk cases, but instead first used Stampin Up carousels and now the Pro Ink Organizer from www.organizemore.com. 

www.crafterscompanion.com with a (now long expired) coupon code for 30% off the “enveloper” and a free DVD with a $25 order; I did bite on this offer but have used the enveloper maybe once in the all time I have had it.  Now they have an “ultimate tool” which includes this same functionality.
4.)  Notes for an old 10 on the 10th blog post (a blogging prompt from Shimelle), that never appeared on my blog with notes for adding interest to layouts, including
using brads in the shape of a flourish, leaves or petals,
dressing up letters in your title by filling in stamped or die-cut shapes with glitter or other media,
coloring staples with Sharpies,
and making big flowers with ribbon.
There was also a short list of tips/tricks, such as:
using waxed dental floss to separate adhered cardstock, which I did a lot before discovering Undo,
heating Snail adhesive with a heat gun to release, which I never attempted before discovering Undo,
sticking a glue dot on the plastic liner on Mementos gold ink pad to keep it attached to the lid,
substituting drywall tape for Magic Mesh, which I would never do now; the day I finally used all my Mesh was magic, so no need to undo that,
and using hair clips to hold cords.  (I bought foam twisty ties for this purpose which are rarely used, as I am not into electronic gadgetry.)
5.)  A list of my Stampin Up stamps shortly after I stopped being a Stampin Up demonstrator in 2009. It is an Excel spreadsheet to be exact, I was an accountant, after all.   Is my stock larger or smaller now than then, you ask?  As this is the fifth point in this post, I will take the 5th on this point.

6.)  Notes from a Stampin Up training session about how best to conduct a workshop in order to keep everyone organized and on task.  I need to employ some of those techniques on myself, like keeping projects separated in boxes so they can be moved around easily.
Oh wait, S!  You do not do so well with boxes – letting things hide in there for years!
My current, and dare I say, smarter version of this method uses open trays for kits and projects in process.

7.)  An uncharacteristically short craft store wish list that included:  shrinky dinks, thin cork, and Glubers [spelling corrected].  That certainly dates back, doesn’t it. I don’t know whether the thin cork was crossed off because I purchased it or because I dismissed needing it.  Of the three items on the list, it is the only one I actually still use today.

8.)  A list of 50 ways to use stamps from scrapbook.com, which thanks to the Wayback Machine website, you can see here.

9.)  A vintage clip art printable from Celeste’s blog here, which no longer appears on source cited, and some vintage printable tickets from 2009 that can still be found here.

10.)  An Ina Garten Food Network recipe for Chicken Piccata, which I was tempted to say I was going to scrapbook so that it wouldn’t be quite so random. Just not true.

Based on the other contents of the box, (yes there were a few mementos in there), all this stuff predates 2011. Times change, but I want to believe some of the old knowledge can still be useful. Would it not be grand if you or I could use one of these tips today. Do you have a quick tip/trick – they call them hacks now – to share in the comments or in our Facebook group?

Until next month, I want to leave you smiling with this last bit from depths of that memento box – stickers!

smileystickers0037 
PS  Wish me luck on sorting out my other memento boxes.

Sunday, June 25, 2017

Scribbles From My Scrap Studio - June 2017


Quick and easy works for me.

Obviously that is why I like making counterfeit kits -- to speed up my scrapbooking.  Another way in which I apply the quick and easy concept relates to scrapbook inspiration.
   
Like many of you, I have Pinterest boards full of layouts that I refer to now and again.  Honestly, I have to admit most of those pinned layouts are well over 2 years old.  If I am in a hurry-up-and-scrap-something mode, I am more likely to reach for something nearby.

I don’t want to have to refer to the computer first (where I can be distracted by other things). Here are some recent examples of other sources:


Product inserts -

like this old Autumn Leaves stamp set (2009).  I picked up this stamp set cheap at the Creating Keepsakes event in April, and within days of bringing it home I had used the layout here as a starting point for one of my own.


Catalogs –

like Close to My Heart are full of scrapbook layout ideas.  In fact, they pretty much trounce their rival competitor, Stampin Up (my preferred stamp vendor) with examples of easy but creative layouts.  Here is an example of one I spied for a layout last month.


Annual Planner -

from Scrapbook and Cards Today has monthly sketches with examples.  I have bought these for the last 3 years.  I never have enough discipline to attempt all the sketches, but I always manage a few.  This one is an example.


Class handouts –

after I have completed a scrapbooking class, especially at conventions or crops, I vacillate on whether or not to hold onto the instructions.  Will the possibility of referring back to the handout outweigh my desire to clear clutter and toss it?  Here is a recent example where the former proved true.


Sketch classes –

I have taken more than a few online sketch classes.  By far, my favorites were some of the earlier ones, maybe because I am now confident enough in my skills that I prefer the simpler sketches that get me started, but don’t force me into finishing a certain way.  I ALWAYS print out the class handouts, and appreciate those classes that give you a summary of just the sketches with examples at the end.  Here is one of the old Studio Calico Sketchbook class examples -  notice there are no embellishments specified.


Page starts -

I also occasionally refer back to Shimelle’s starting points posts – remember those?  In my mind these are a great way to use up scraps when trying to kill a kit.  Sometimes I will make up the starting point and file it away, sometimes it will be started and finished all at once. Having printed out a lot of them, I resurrected this sheet not long ago to finish off these last few Heidi Swapp papers.


So there you have it.  For quick and easy inspiration, I prefer paper over the ‘puter!


You will notice that scrapbook magazines are not listed there.  I haven’t subscribed in years, since Scrap 365 was discontinued.  I only get the occasional issue of Scrapbook and Cards today when it is free in an order from that huge online scrapbook store I love so much.  I do flip through the online issues of magazines, but I rarely print out ideas or refer back to them. (I know I am dreadfully old school.)

How about you – what is your go-to source for inspiration when you want it to be quick and easy?  How do you keep yourself focused when faced with all the inspiration available online?  Do tell!

And why not try reaching for one of those sources of inspiration, completing a layout and uploading it to our Facebook community group.