
 |
| Original Embellishments from Inspiration Kit |
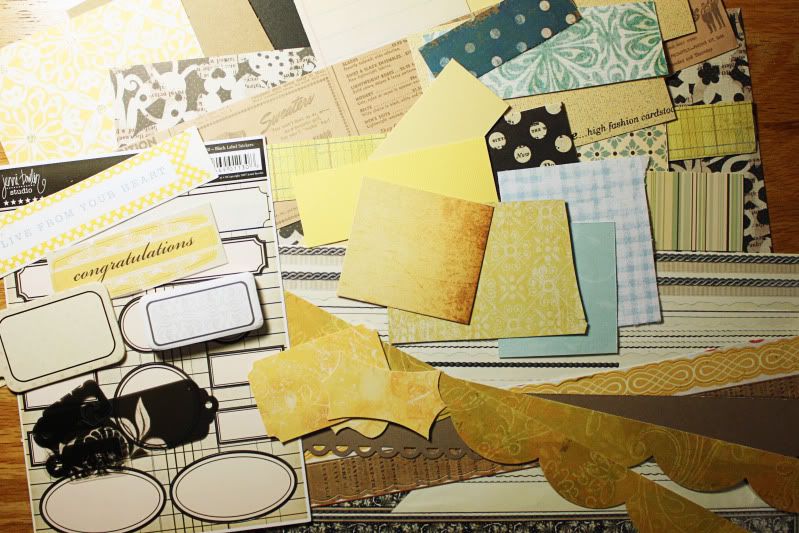 |
| 1- Find bits and pieces of scraps, label stickers, and border stickers that have similar "base" colors and patterns. 2- Cut the scraps into the desired shapes and mount a few on chipboard. |
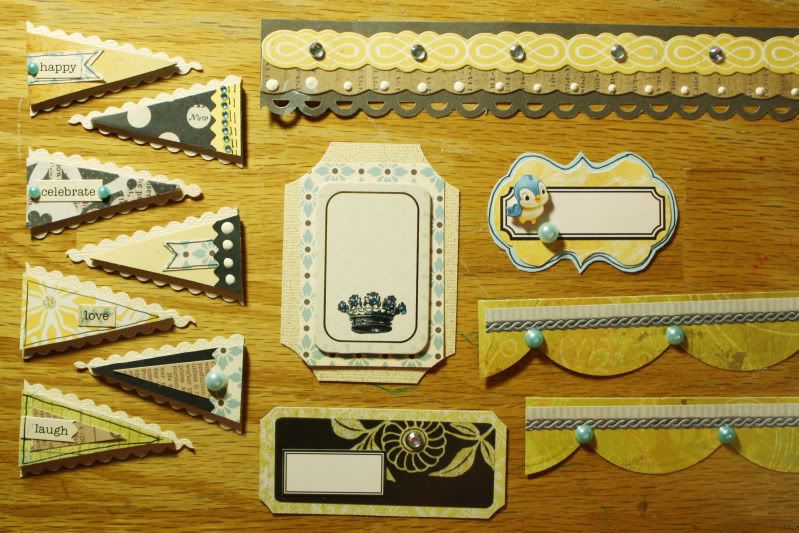 |
| 3- Layer various patterns and pieces of paper on top of one another 4- Embellish the pieces with glitter, rhinestones, pearls, liquid glass (glossy accents), and/or pearlized puffy paint. |
Wow - these look fantastic! I forget to try to counterfeit stuff like this and just substitute - but these have given me some new ideas - lovely!
ReplyDeleteBeautiful way to use up scraps!
ReplyDeleteGreat idea! I'm such a lazy scrapper that I never think to do things like this! Thanks for the inspiration!
ReplyDeleteAmazing! I love your embellies. Maybe I can get motivated and make some of my own. Hoping to do more creative make-it-myself things this year.
ReplyDeleteBrilliant...I'm totally doing this.
ReplyDeleteWow! I remember when this blog first started and I participated in the first couple, then I started working 60 hours a week and scrapbooking was a distant memory. I just became a SAHM again, and looked up your blog! I have already made 2 kits...now I have a question! How do you guys store the kits until you are ready to use them? Anyone have any photos for examples? Thanks!
ReplyDeleteWOW, these are amazing! Great Job!
ReplyDeleteAnd to answer the question about storing my kit...I have 3 large (about 13x13) scrapbook bags would be the best way to describe them. They ate made out of a frosted plastic type material. There came in a set and they are from Oriential Trader, but I got them like 5 years ago. I just looked and they have a set of 3 boxes that are 13x13x2 for $15. Hope this helps!
I also store my kits in the 2-Gallon ziplock bags. I get a box of 8 or 10 for $1 at my Dollar Tree, but I believe WalMart carries them too. The bags are larger than 12x12 so everything fits!
ReplyDeleteI think we should do a post about kit storage next month...I will do that. I'll also include pics for the post. It will be during the first few days of February. Thanks for the idea :)
wow easy and amazing thanks for sharing.
ReplyDeleteTo come back to the question about storing my kits - I kept some of the pizza boxes from back in the day when I actually *shock horror* BOUGHT a monthly kit. Before I discovered the CKC I hasten to add *wink*! Anyway, I used those to keep all my goodies together and then for the month that I am using it, I sometimes transfer the embellishments to a bowl on my scrap desk to keep them all together. That way, I can just grab the box and plonk it on my table to use. I have about four boxes piled up on the floor which includes this months and a couple of unending kits that need to be finished off or broken back into my stash. I find that a manageable number. And the boxes can be used over and over and over again. Maybe your local pizza delivery place would let you have a couple of 13" boxes?
ReplyDeleteI never thought of a pizza box...so simple and easy! And I know my pizza place will give me some, we eat there all the time!
ReplyDelete