Are you short on time or do you just need to scrap a few photos or are you a beginner scrapbooker? Then a mini kit may be for you. A mini kit offers simplicity. It's perfect for beginners or those with limited time. It's also portable and budget friendly, allowing you to create without have overwhelming choices. Two of our Master Forgers are going to show you how they build a mini kit and how they use them.
Let's take a look at our Inspiration Kit:
I went with a project other than scrapbooking! I wanted to mix it up a bit with some Thanksgiving table decor. Yes, it is a bit early, but if I start now I will have time to actually get them all done. For this post I finished just three. Check them out!
Now let's briefly walk through the process. Here is the kit I put together. I grabbed three pattern papers, three solid-ish paper, a phrase stamp set & a die set to cut them out, and a layering die set to create some labels. Included are a few of the supplies I pulled out during my FOF project (see it here). I didn't remake those items, but just used the ones I make for that blog post.
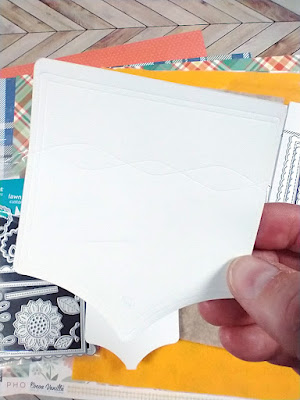
Notice those white pieces in the middle? Those are from a cut file I created for this project! This is free over on my blog if you want to give this a try. It cuts a small notecard with a pocket to layer on the front! Plus if you have scoring/embossing options on your cutter, you can get the added embossed detail! (Video tutorial)
I cut a bunch of the cards & pocket layers out of all my pattern papers. I mixed and matched pockets with cards to maximize contrast between the layers.
The cut file includes these small notches to align with your score tool for scoring and folding the notecard.
I added pen stitching into the embossed lines for more detail! It is easy when you can just follow the guide lines.
I used my phrase stamp & die to cut out some fitting words for the occasion.
After inking the edges with a bit of white pigment ink for a bit of pop, I layere them up on my project with foam tape.
I cut some scalloped shapes from a nested layering die. I used leftovers of the pattern paper as well as the craft to make these name tags. Using those felt flowers from the FOF project I glued them to the very edge of the name tags. This will allow the flower to overlap the pocket edge.
So here they all are tucked into their pockets. Guests can have fun peeking in the pockets to find their name!
Just one more view of these table name tags!
(I do have a process video if you want to see more.)
- 12th October- Challenge #1
- 18th October - Challenge #2
- 22nd October - Challenge #3 Sketch Challenge
- 24th October - Follower Showcase
- 28th October - November Sneak Peek (on Instagram and the Facebook Community)
- 30th October- Challenge #4 Baby, Use Those Scraps Challenge
Show us what you've got! We love our followers! Make sure that you come hang out with us on the Facebook Community Group. You can also catch us on Instagram by tagging #counterfeitkitchallenge and #ckcoctober2024
Happy Scrapping!
 |
| JoJo |


No comments:
Post a Comment
Compliance with the new European Union E-Privacy Regulation
If you leave a comment on this blog, you do so with the knowledge that your name and blog link are visible to all who visit this blog, that you have published your own personal details and that you have consented for your personal information to be displayed.
This blog is currently generated from the USA with contributors from Europe, Australia and the USA.